If you’re currently running many websites or blogs and need securing your site with certificate SSLs? If so, you can try to use free Let’s Encrypt certificate SSL which can be installed on your websites or blogs without spend money. Yeah, it’s free, auto renewed certificate SSL, and open certificate authority (CA) for public benefit.
Let’s Encrypt was officialy released on November 2014 with the critical missions or goals to securing all websites on the public internet and blogs using HTTPS connections (SSL/TLS) without the costs at all. There are over 250 million websites on the public internet are relying on the Let’s Encrypt certificate SSL. That’s why I don’t suprised if the Let’s Encrypt became the world’s largest certificate authority on the internet.
Currently Let’s Encrypt is maintenanced and actively developed by non-profit organizations, that’s Internet Security Research Group or ISRG. You can enable HTTPS connections using SSL/TLS provided by Let’s Encrypt on all of your websites for free without any costs. The ISRG missions is to build and create a more secure web ecosystems, user friendly and respect the privacy of all websites over public internet, including respect the privacy of the website owner or creators.
Stay relax about privacy, since Let’s Encrypt is a trusted certificate at zero cost and give you best practices on TLS security industry. Either it viewed from the sides of the certificate authority (CA) and make it more easily for website operators or site owners to secure their website and servers. Let’s Encrypt SSL can be installed on almost all platform like Apache/NGINX/LiteSpeed web server, Haproxy, Plex. Apart from that, it can be integrated as well with Kubernetes, Docker and some web based control panel, including cPanel-WHM, Plesk, HestiaCP, VestaCP, aaPanel, CyberPanel, and more.

Let’s Encrypt is backed by many big companies in the IT industry over the world like IBM, OVH, Cisco, Red Hat, Amazon Web Services (AWS), Vultr, Digital Ocean, NGINX (F5), HAproxy, MongoDB, Github, Internet Society, Akamai and EFF. Let’s Encrypt have also major sponsors or funder where the money come from, including but not limited to SiteGround, Vmware, ServerPilot, ONE.COM, DAN.COM, WIX.com, Rack Speed, LIVESPORT, wpbeginner, netlify, VTEX, Automatic, shopify, mozilla, and more.
Today we will guide you on how to installing and configuring Let’s Encrypt certificate SSL with NGINX web server on Debian 11 (bullseye). I will use my Elastic Compute Engine from Alibaba Cloud to deploy Let’s Encrypt SSL on NGINX. Pleaso note, Let’s Encrypt is not only free, but it also auto renewed certificate, implementation, signing, and validations.
PREREQUISITES:
* VPS, Cloud or Bare-Metal
* Running under Operating System Debian 11 (bullseye)
* Server IPv4 Address with Superuser Privileges (Root Access)
* Must Have Running NGINX Web Server with its ServerBlock
* Must Have Active and Running Website with NGINX
* Domain must be propagated or pointed correctly to your server
* Gnome Terminal for Linux Desktop
* PuTTy SSH Client for Windows or Mac
* Powershell for Windows 10/11
1.) Connect to your machine using the following command.
Make sure to change 8.216.32.6 with your actual server IPv4 address, and and replace 22 with your server SSH port number.
- - - - - - - - - - - - - - - - - - - - - - - - - - - -
~# ssh [email protected] -p22 Password:
- - - - - - - - - - - - - - - - - - - - - - - - - - - -
2.) Run Software Updater
Then run software updater to get the latest available software or packages from the official OS vendors repository.
- - - - - - - - - - - - - - - - - - - - - - - - - - - -
~# apt update && apt upgrade
- - - - - - - - - - - - - - - - - - - - - - - - - - - -
3.) Create a Documents Root or Website Public Directory
This is a mandatory step, where you must setting up website public directory (On cPanel-WHM it’s called public_html) to put all of your website files and folders. I will use my subdomain called “le.fcgid.com”. Make sure to replace “le.fcgid.com” with your actual domain name.
- - - - - - - - - - - - - - - - - - - - - - - - - - - -
~# mkdir -p /var/www/le.fcgid.com/public/ /var/www/le.fcgid.com/logs/

~# cd /var/www/le.fcgid.com/public/

Then simply create index.html file with the following Hello World contents:

nano index.html
GNU nano 5.4 index.html

Hello World...
- - - - - - - - - - - - - - - - - - - - - - - - - - - -
4.) Setting up NGINX web server and its ServerBlock
Before installing Let’s Encrypt SSL, make sure to install and configuring NGINX web server and its ServerBlock for your domain. On Apache it’s called vhost or virtual hosts.
Just for testing implementations or experiments, you can use “default” serverblock which available inside directory of /etc/nginx/sites-available/. However, I will use my serverblock called “le.fcgid.com” and place it on sites-available directory.
- - - - - - - - - - - - - - - - - - - - - - - - - - - -
~# nano /etc/nginx/sites-available/le.fcgid.com
- - - - - - - - - - - - - - - - - - - - - - - - - - - -
# Virtual Host Configuration by FCGID.com (Please don't alter these files manually)
server {
listen 80; ## listen for ipv4; this line is default and implied
#listen [::]:80 default ipv6only=on; ## listen for ipv6

root /var/www/le.fcgid.com/public/;
index index.htm index.html index.php;

# Make site accessible from public
server_name le.fcgid.com www.le.fcgid.com;

#access_log /var/log/nginx/le.fcgid.com.access.log;
error_log /var/log/nginx/le.fcgid.com.error.log;
access_log off;

location / {
try_files $uri $uri/ /index.php?$args;
}

# Fastcgi-Cache Config
location ~ \.php$ {
try_files $uri =404;
fastcgi_pass 127.0.0.1:9000; ## you should adjust it as well on php-fpm-pool config or pool configuration files.
include fastcgi_params;
include fastcgi.conf;
fastcgi_param HTTP_PROXY "";
fastcgi_index index.php;
# fastcgi_intercept_errors on;
}

# Static Cache Config
location ~* ^.+\.(ogg|ogv|svg|svgz|eot|otf|woff|mp4|ttf|rss|atom|jpg|jpeg|gif|png|ico|css|js|zip|tgz|gz|rar|bz2|doc|xls|exe|ppt|tar|mid|midi|wav|bmp|rtf)$ {
access_log off; log_not_found off; expires 360d;
add_header Access-Control-Allow-Origin "*";
}

location = /robots.txt { access_log off; log_not_found off; }
location ~ /\. { deny all; access_log off; log_not_found off; }

}
- - - - - - - - - - - - - - - - - - - - - - - - - - - -
5.) Let’s Symlink to the Sites-Enabled and Logs Directory
Then we should symlink it to the NGINX sites-enabled and log directories. Kindly run the following commands:
- - - - - - - - - - - - - - - - - - - - - - - - - - - -
~# ln -s /etc/nginx/sites-available/le.fcgid.com /etc/nginx/sites-enabled/

~# ln -s /var/log/nginx/le.fcgid.com.access.log /var/www/le.fcgid.com/logs/access.log

~# ln -s /var/log/nginx/le.fcgid.com.error.log /var/www/le.fcgid.com/logs/error.log
- - - - - - - - - - - - - - - - - - - - - - - - - - - -
6.) Don’t forget to restart NGINX web server on your instance using below command.
- - - - - - - - - - - - - - - - - - - - - - - - - - - -
~# systemctl restart nginx.service
- - - - - - - - - - - - - - - - - - - - - - - - - - - -
7.) Pointing Your Domain to Your Server IPv4 Address
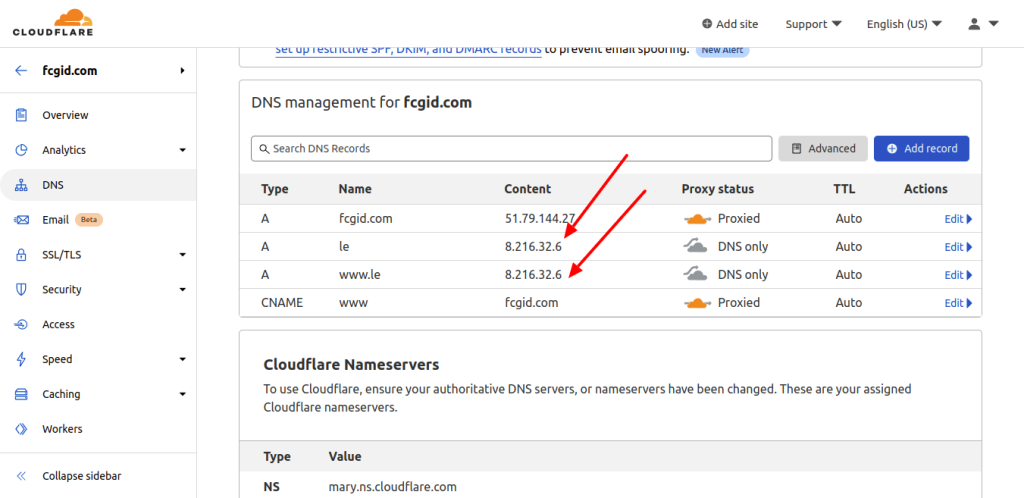
Next, make sure to pointed your domain name into your server IPv4 address, either it using DNS, Proxy and CDN from CloudFlare or you can setting up Private Name Server or Child-NS on your domain registrar. On this step I will use CloudFlare to set A record DNS for my domain name. See the following screenshots.

7.) Install SNAP or SNAPD for Debian/Ubuntu-Based Operating System
SNAP or also called SNAPD is a software packaging and deployment system for Linux-based operating system, including Debian/Ubuntu and RHEL/Fedora derivative like CentOS, CloudLinux, AlmaLinux and Rocky Linux. It use the Linux kernel to perform deployment system on the node. Currently SNAP/SNAPD (package manager) it’s actively developed and maintenanced by Canonical, a company behind the Ubuntu OS.
- - - - - - - - - - - - - - - - - - - - - - - - - - - -
~# apt install snapd -y
- - - - - - - - - - - - - - - - - - - - - - - - - - - -
8.) Update SNAP/SNAPD Package
Don’t forget to update SNAPD package to the latest stable version, using the following command.
- - - - - - - - - - - - - - - - - - - - - - - - - - - -
~# snap install core; sudo snap refresh core
- - - - - - - - - - - - - - - - - - - - - - - - - - - -
9.) Let’s Install Certbot ACME Client for Let’s Encrypt Certificate SSL
After that we can move to the next step to install and configure Certbot ACME client on your Debian 11 machine. Just for info that Certbot client can handle Let’s Encrypt certificate installations with zero downtime. Simply run the following command to install Certbot using Snapd software.
- - - - - - - - - - - - - - - - - - - - - - - - - - - -
~# snap install --classic certbot
- - - - - - - - - - - - - - - - - - - - - - - - - - - -
10.) Symlink Certbot Directory
Then we need to symlink certbot from the “snap” directory into the “usr” directory. Simply run the following command.
- - - - - - - - - - - - - - - - - - - - - - - - - - - -
~# ln -s /snap/bin/certbot /usr/bin/certbot
- - - - - - - - - - - - - - - - - - - - - - - - - - - -
11.) Install Let’s Encrypt SSL Certificate with CERTBOT
Next, we can moving forward to install Let’s Encrypt SSL certificate using certbot command.
~# certbot --nginx
Saving debug log to /var/log/letsencrypt/letsencrypt.log

Which names would you like to activate HTTPS for?
- - - - - - - - - - - - - - - - - - - - - - - - - - - - - - - - - - - - - - - -
1: le.fcgid.com
- - - - - - - - - - - - - - - - - - - - - - - - - - - - - - - - - - - - - - - -
Select the appropriate numbers separated by commas and/or spaces, or leave input
blank to select all options shown (Enter 'c' to cancel): 1
Certificate not yet due for renewal

You have an existing certificate that has exactly the same domains or certificate name you requested and isn't close to expiry.
(ref: /etc/letsencrypt/renewal/le.fcgid.com.conf)

What would you like to do?
- - - - - - - - - - - - - - - - - - - - - - - - - - - - - - - - - - - - - - - -
1: Attempt to reinstall this existing certificate
2: Renew & replace the certificate (may be subject to CA rate limits)
- - - - - - - - - - - - - - - - - - - - - - - - - - - - - - - - - - - - - - - -
Select the appropriate number [1-2] then [enter] (press 'c' to cancel): 1
Deploying certificate
Successfully deployed certificate for le.fcgid.com to /etc/nginx/sites-enabled/default
Congratulations! You have successfully enabled HTTPS on https://le.fcgid.com

- - - - - - - - - - - - - - - - - - - - - - - - - - - - - - - - - - - - - - - -
If you like Certbot, please consider supporting our work by:
* Donating to ISRG / Let's Encrypt: https://letsencrypt.org/donate
* Donating to EFF: https://eff.org/donate-le
- - - - - - - - - - - - - - - - - - - - - - - - - - - - - - - - - - - - - - - -
12.) Simulate the Auto Renewal for Let’s Encrypt
As you know the Let’s Encrypt certificate SSL will be auto renewed before 90 days from its expiration date. Usually one week before its expired date of your Let’s Encrypt certificate SSL, certbot will try to renewal it automatically. However, you can simulate the certbot auto-renew for Let’s Encrypt via SSH console with the following command.
~# certbot renew --dry-run

Saving debug log to /var/log/letsencrypt/letsencrypt.log

- - - - - - - - - - - - - - - - - - - - - - - - - - - - - - - - - - - - - - - -
Processing /etc/letsencrypt/renewal/le.fcgid.com.conf
- - - - - - - - - - - - - - - - - - - - - - - - - - - - - - - - - - - - - - - -
Account registered.
Simulating renewal of an existing certificate for le.fcgid.com

- - - - - - - - - - - - - - - - - - - - - - - - - - - - - - - - - - - - - - - -
Congratulations, all simulated renewals succeeded:
/etc/letsencrypt/live/le.fcgid.com/fullchain.pem (success)
- - - - - - - - - - - - - - - - - - - - - - - - - - - - - - - - - - - - - - - -
root@iZ6we9s0vpre0oqr9x39ieZ:~#
13.) Test and Check Your SSL Installations
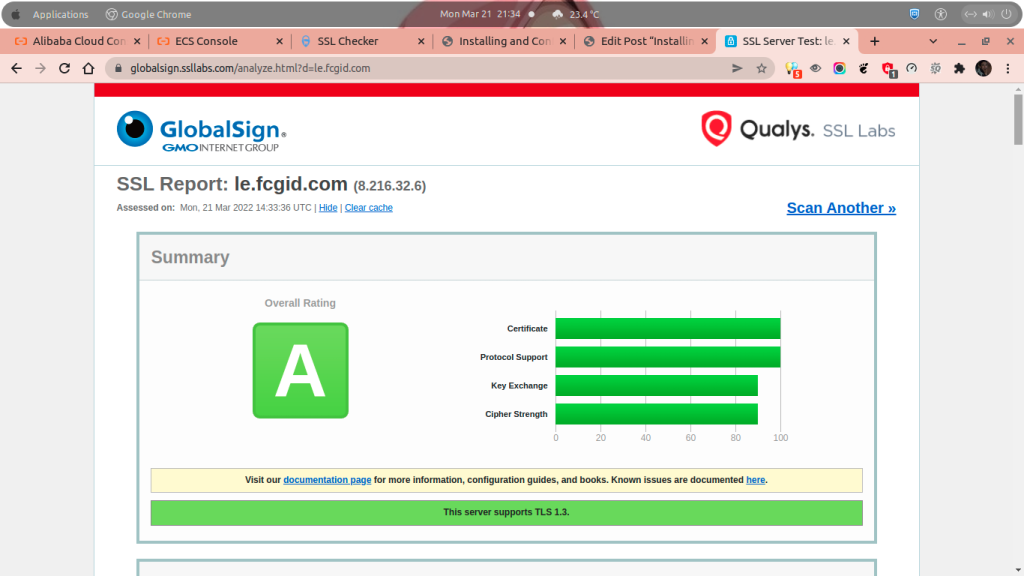
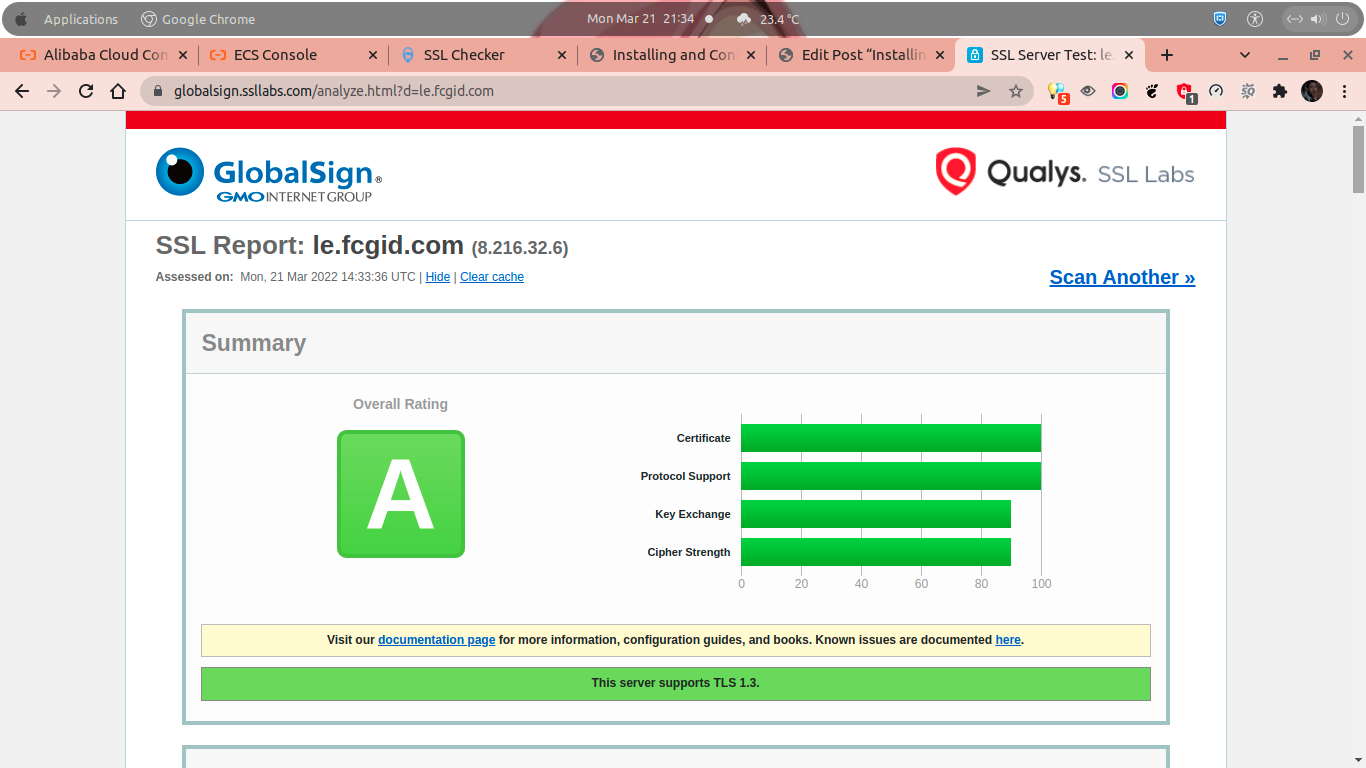
On the last step you can test your Let’s Encrypt SSL installation on some free SSL Server Test such as Qualys SSL Labs, SSL Shopper, or Comodo SSL Checker. You can check the following screenshots.

CONCLUSIONS:
You have successfully installing and deploying free, auto-renewed Let’s Encrypt certificate SSL on your server. You can use it at any time you want, either it on your corporate websites, portofolios, or personal blogs.


