VestaCP is a super lightweight web hosting control panel with a simple user interface, which is completely free under GNU General Public License V3, and has a very complete and smart set of web hosting features.
You can build powerful web servers in just a few commands with VestaCP, including building Nginx with PHP-FPM and MariaDB database server.
Well, in this tutorial we will guide you on how to change the default VestaCP port. This guide can be used on all Linux distributions supported by VestaCP, both on Debian/Ubuntu and RHEL/CentOS servers.
Changing VestaCP Default Port
As you know VestaCP uses 8083 as the default port for its login control panel. We need to change the VestaCP default port clearly aiming to make VestaCP login more secure.
1. Login to VestaCP
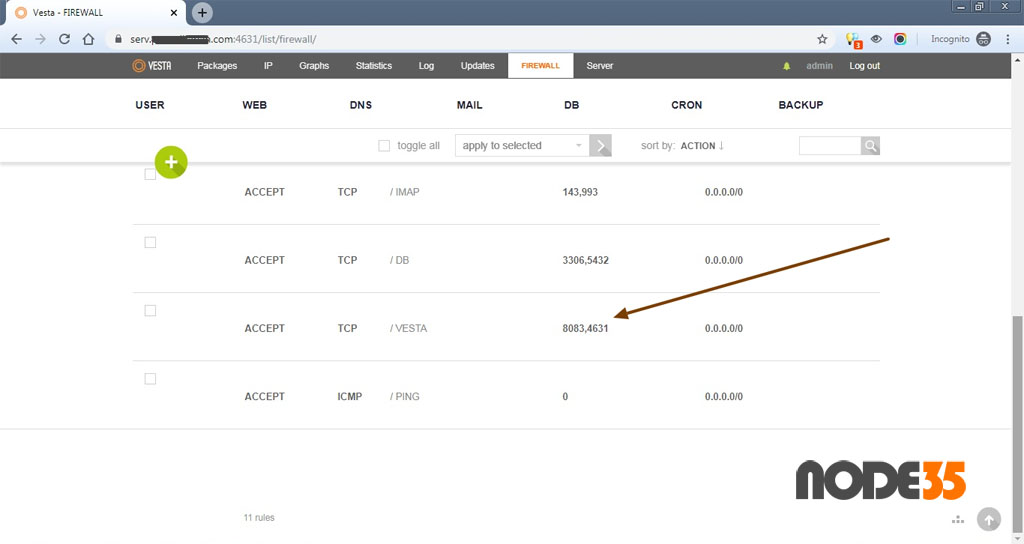
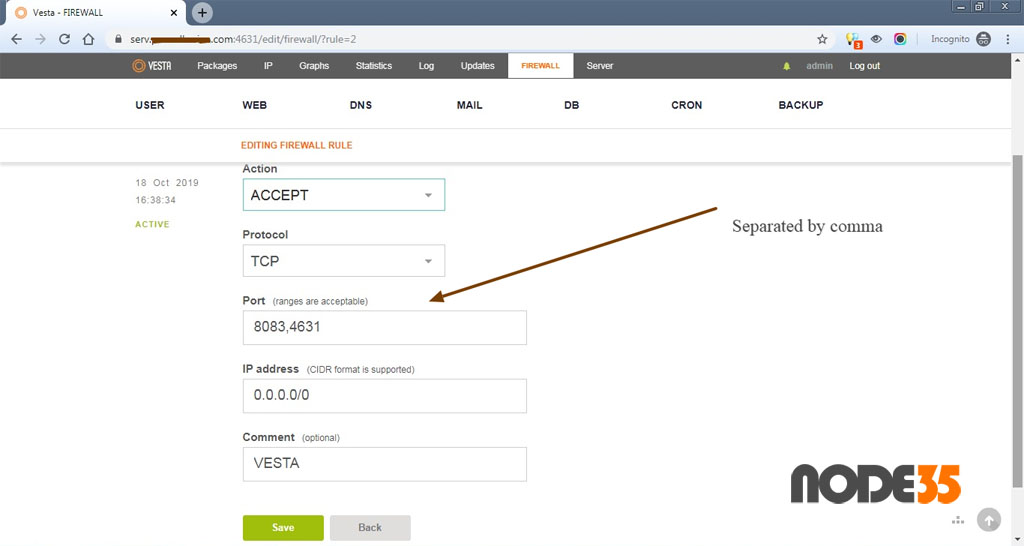
Login to your VestaCP and scroll to the Firewall menu (top right). If you currently use Iptables firewall, you need to add the new port to the Firewall rule first and then click Save. The new port is the port that you will use to replace the default VestaCP port.
https://server_IPv4_Address:8083/list/firewall/For example we use port 4631 on our VestaCP. Well, you can also use other port numbers for VestaCP login, as you wish. For more details, please see the following screenshot.
Restart Iptables firewall and Fail2ban
$ service iptables restart
$ service fail2ban restart
However, if your VestaCP server uses ConfigServer Security & Firewall (CSF) you must first add a new VestaCP port to the CSF rules (IPv4 and IPv6 Port Settings).
Open CSF in your Vesta control panel and then scroll down to the Firewall Configuration, then select IPv4 and IPv6 Port Settings in the drop down menu. Don’t forget to save change.
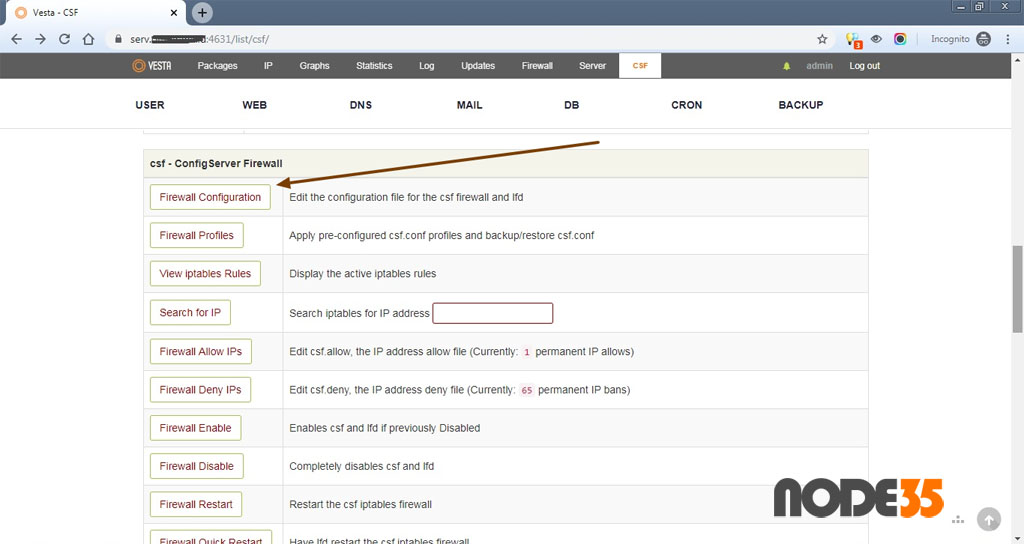
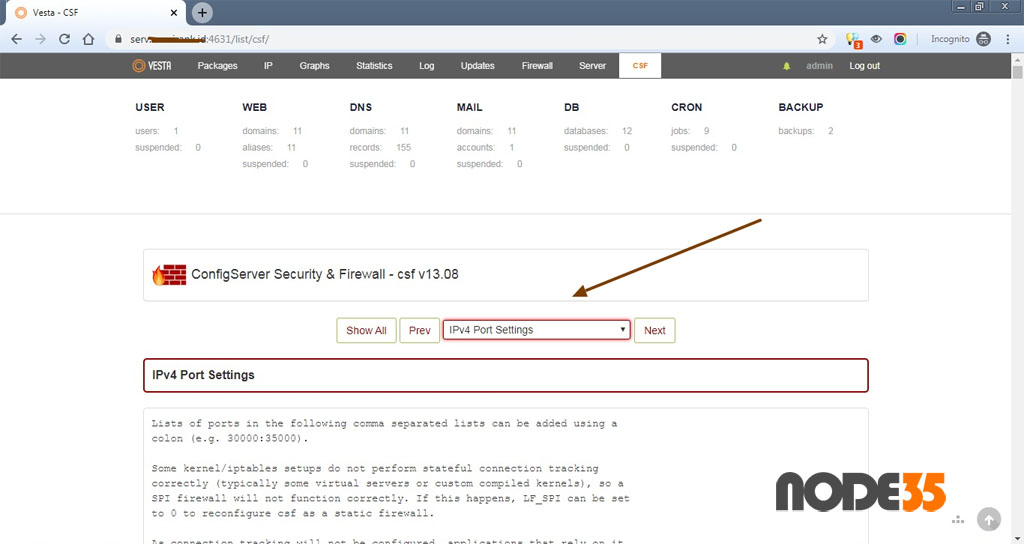
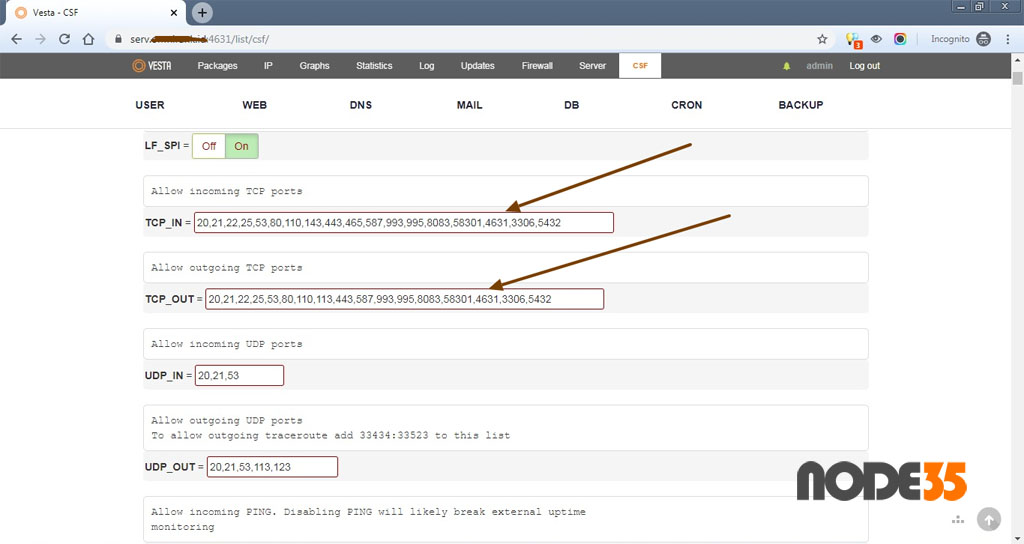
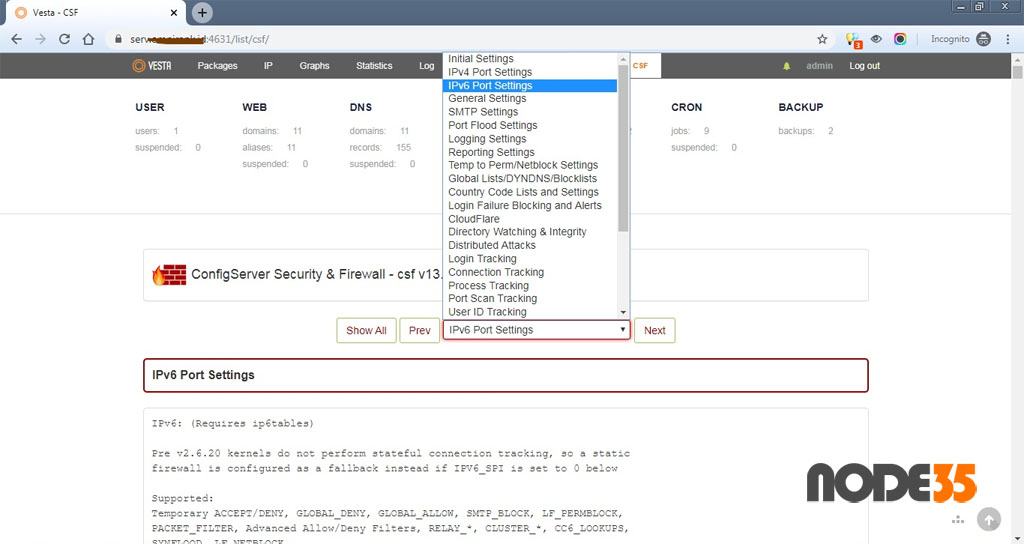
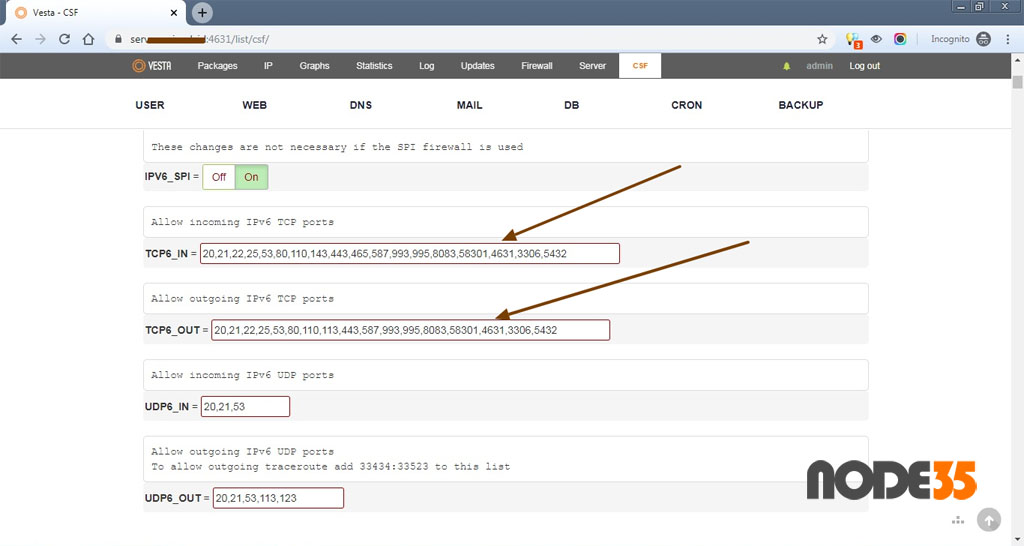
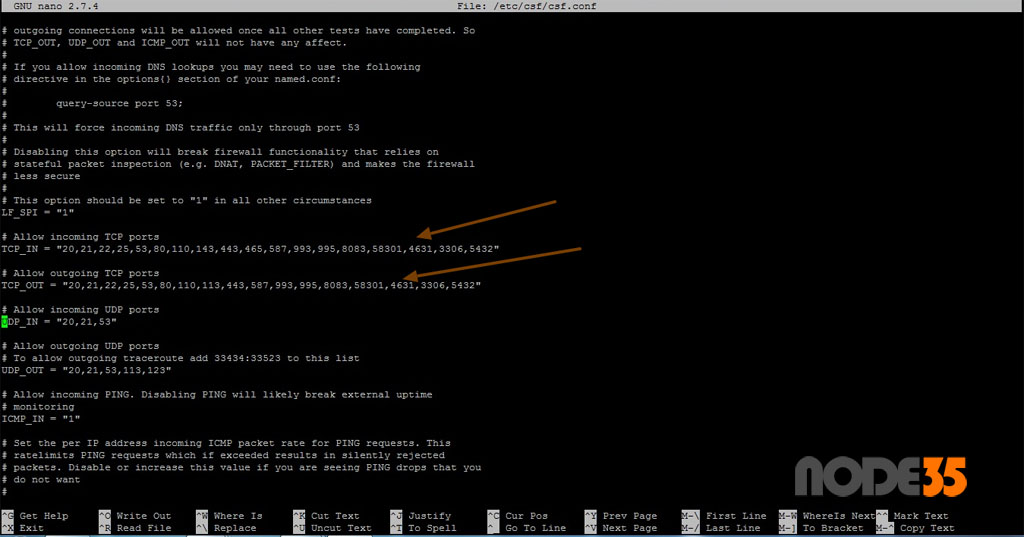
You can also add this new port directly to the /etc/csf/csf.conf file with nano editor. Make sure you have root privileges to edit the csf.conf file. See the above screenshots for more detail.
root@serv:~# nano /etc/csf/csf.conf

# Allow incoming TCP ports
TCP_IN = "20,21,22,25,53,80,110,143,443,465,587,993,995,8083,58301,4631,3306,5432"

# Allow outgoing TCP ports
TCP_OUT = "20,21,22,25,53,80,110,113,443,587,993,995,8083,58301,4631,3306,5432"

# Allow incoming IPv6 TCP ports
TCP6_IN = "20,21,22,25,53,80,110,143,443,465,587,993,995,8083,58301,4631,3306,5432"

# Allow outgoing IPv6 TCP ports
TCP6_OUT = "20,21,22,25,53,80,110,113,443,587,993,995,8083,58301,4631,3306,5432"
Then click save (CTRL + O + ENTER) and Exit (CTRL + X).
Restart CSF and LFD
$ csf -r
$ lfd -r
2. Opening Nginx Config File
Next step, open the /usr/local/vesta/nginx/conf/nginx.conf file to change the default VestaCP port. Here we use the nano editor because it’s easy to use.
$ nano /usr/local/vesta/nginx/conf/nginx.confLook for the following lines:
# Vhost
server {
listen 8083;
server_name _;
root /usr/local/vesta/web;
charset utf-8;
And then change listen port from 8083 to 4631:
# Vhost
server {
listen 4631;
server_name _;
root /usr/local/vesta/web;
charset utf-8;
3. Restart Services
We need to restart several important services, including Firewall, Nginx and VestaCP
$ service iptables restart
$ csf -r
$ lfd -r
$ service nginx restart
$ service vesta restart
4. That’s a Wrap
All Done, now you can access the Vesta control panel with a new VestaCP port in your browser.

We are a bunch of people who are still continue to learn Linux servers. Only high passion keeps pushing us to learn everything.

