This guide will help you to install and configure ionCube Loader PHP Extension on VestaCP.
You can use this tutorial properly on all Linux distributions supported by VestaCP, including RHEL/CentOS and Debian/Ubuntu.
ionCube Loader is a PHP extension that allows PHP to load encoded and protected files, which we can generally find in some commercial software, and PHP-based premium CMS.
Some premium WordPress themes and plugins even require to use ionCube Loader to make them usable.
REQUIREMENTS
- You have root privileges on your server
- VestaCP must already be installed, either running on RHEL/CentOS or Debian/Ubuntu
- You are familiar with Linux commands (CLI / Command Line Interface)
- You are familiar with nano editor and WinSCP
Please note; in this tutorial we use subdomain dev.node35.com and VestaCP CentOS 7 with Nginx + PHP 7.3 with FastCGI Process Manager (PHP-FPM).
So make sure to replace dev.node35.com with your actual domain name.
1. Open your site’s public_html directory
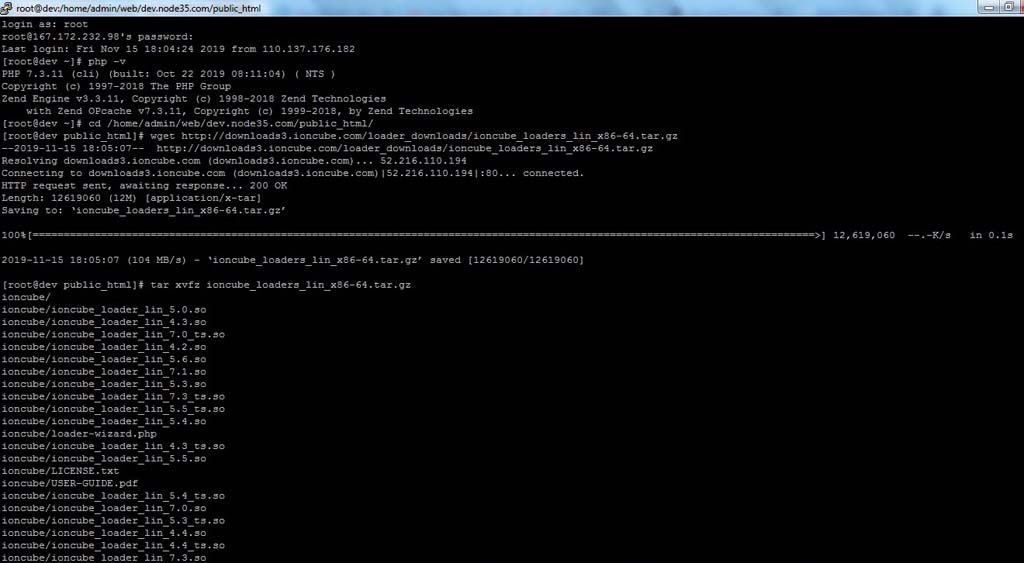
$ cd /home/admin/web/dev.node35.com/public_html/
2. Download ionCube Loader PHP Extension
# For 32-bit System
             Latest: wget http://downloads3.ioncube.com/loader_downloads/ioncube_loaders_lin_x86.tar.gz
             Stable: wget http://downloads3.ioncube.com/loader_downloads/ioncube_loaders_lin_x86_5.1.2.tar.gz
# For 64-bit System
Latest: wget http://downloads3.ioncube.com/loader_downloads/ioncube_loaders_lin_x86-64.tar.gz
Stable: wget http://downloads3.ioncube.com/loader_downloads/ioncube_loaders_lin_x86-64_5.1.2.tar.gzWe usually use the latest version of ionCube Loader for 64-bit systems. You can check ionCube Loader version here: https://www.ioncube.com/loaders.php
3. Let’s Extract the ionCube Loader File
# For 32-bit System: tar xvfz ioncube_loaders_lin_x86.tar.gz
                     tar xvfz ioncube_loaders_lin_x86_5.1.2.tar.gz
# For 64-bit System: tar xvfz ioncube_loaders_lin_x86-64.tar.gz
tar xvfz ioncube_loaders_lin_x86-64_5.1.2.tar.gz4. Set the Correct Permissions (CHMOD) for ionCube Files and Folders:
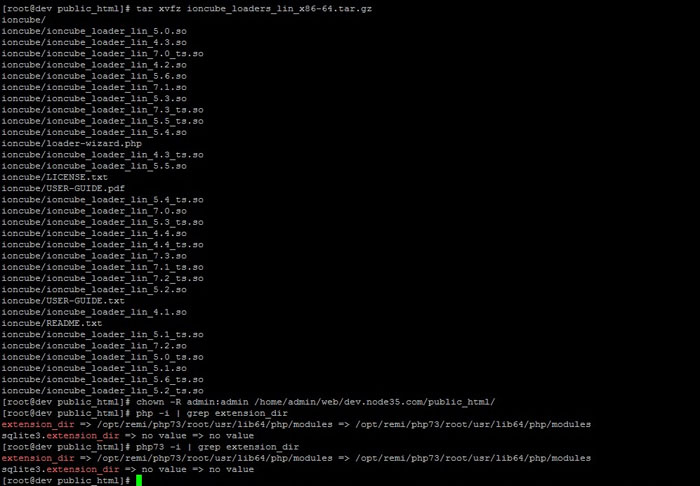
$ chown -R admin:admin /home/admin/web/dev.node35.com/public_html/
5. Search for the PHP Extension Directory on Your Server
We need to run the following command to find out the PHP extension directory on our server. Since we will copy the ioncube loader file to that directory.
$ php -i | grep extension_dir
$ extension_dir => /opt/remi/php73/root/usr/lib64/php/modules => /opt/remi/php73/root/usr/lib64/php/modules
$ sqlite3.extension_dir => no value => no value
If you’re running a different PHP version (for example using PHP 7.2, instead of the default PHP from VestaCP), you can also use the following different command to search the PHP extension directory.
For RHEL/CentOS:
$ php -i | grep extension_dir
$ php73 -i | grep extension_dir
$ php72 -i | grep extension_dir
$ php71 -i | grep extension_dir
$ php70 -i | grep extension_dir
$ php56 -i | grep extension_dir
For Debian/Ubuntu:
$ php -i | grep extension_dir
$ php5.6 -i | grep extension_dir
$ php7.0 -i | grep extension_dir
$ php7.1 -i | grep extension_dir
$ php7.2 -i | grep extension_dir
$ php7.3 -i | grep extension_dir
6. Let’s Copy ionCube Loader File to the PHP Extension Directory
Since we use PHP 7.3 on VestaCP, we must copy ioncube_loader_lin_7.3.so file to the /opt/remi/php73/root/usr/lib64/php/modules directory in order to make ionCube Loader work on your server
$ cp /home/admin/web/dev.node35.com/public_html/ioncube/ioncube_loader_lin_7.3.so /opt/remi/php73/root/usr/lib64/php/modules/
7. Configure ionCube Loader on VestaCP
Add the following “zend_extension” directive to php.ini file. Paste this code in the bottom line of the php.ini file.
zend_extension = /opt/remi/php73/root/usr/lib64/php/modules/ioncube_loader_lin_7.3.so
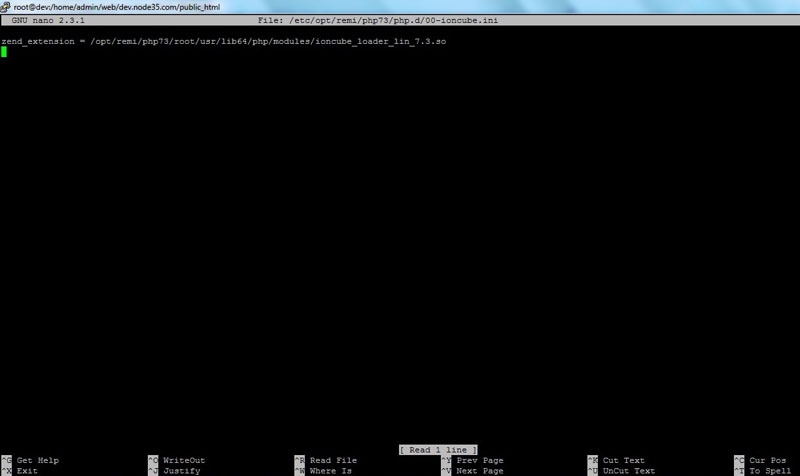
Or we can also create a file called 00-ioncube.ini inside the /etc/php.d directory. And then paste this “zend_extension” directive to 00-ioncube.ini file.
$ nano /etc/php.d/00-ioncube.ini
zend_extension = /opt/remi/php73/root/usr/lib64/php/modules/ioncube_loader_lin_7.3.so
8. VestaCP with Different PHP-FPM Version
If you have VestaCP installed on CentOS 7 server with different PHP-FPM versions (for example PHP 7.0, PHP 7.1, PHP 7.2 and PHP 7.3), you need to create 00-ioncube.ini file inside these directories.
For PHP 7.3 >> # /etc/opt/remi/php73/php.d/
For PHP 7.2 >> # /etc/opt/remi/php72/php.d/
For PHP 7.1 >> # /etc/opt/remi/php71/php.d/
For PHP 7.0 >> # /etc/opt/remi/php70/php.d/
Let’s open with nano editor
$ nano /etc/opt/remi/php73/php.d/00-ioncube.ini
$ nano /etc/opt/remi/php72/php.d/00-ioncube.ini
$ nano /etc/opt/remi/php71/php.d/00-ioncube.ini
$ nano /etc/opt/remi/php70/php.d/00-ioncube.ini
After that, paste the following zend_extension directive into your 00-ioncube.ini file inside that directory, depending on the PHP version you are using.
For PHP 7.3 >> # zend_extension = /opt/remi/php73/root/usr/lib64/php/modules/ioncube_loader_lin_7.3.so
For PHP 7.2 >> # zend_extension = /opt/remi/php72/root/usr/lib64/php/modules/ioncube_loader_lin_7.2.so
For PHP 7.1 >> # zend_extension = /opt/remi/php71/root/usr/lib64/php/modules/ioncube_loader_lin_7.1.so
For PHP 7.0 >> # zend_extension = /opt/remi/php70/root/usr/lib64/php/modules/ioncube_loader_lin_7.0.so
9. Configuring Ioncube Loader for VestaCP on Ubuntu 18.04 LTS Server
If you’re running VestaCP on Ubuntu 18.04 LTS, you need to add the following zend_extension directive at the bottom line of the /etc/php/7.2/cli/php.ini and /etc/php/7.2/fpm/php.ini files.
zend_extension = /usr/lib/php/20170718/ioncube_loader_lin_7.2.so
Or create 00-ioncube.ini file inside the following directory:
$ /etc/php/7.2/mods-available/
$ /etc/php/7.2/fpm/conf.d/
$ /etc/php/7.2/cli/conf.d/
$ nano /etc/php/7.2/mods-available/00-ioncube.ini
$ nano /etc/php/7.2/fpm/conf.d/00-ioncube.ini
$ nano /etc/php/7.2/cli/conf.d/00-ioncube.ini
zend_extension = /usr/lib/php/20170718/ioncube_loader_lin_7.2.so
10. Restart VestaCP, Apache, Nginx and PHP-FPM
After the ionCube Loader installation is complete, we need to restart several important services, including VestaCP, Apache, Nginx and PHP-FPM (depending on the web server you are using).
$ service httpd restart
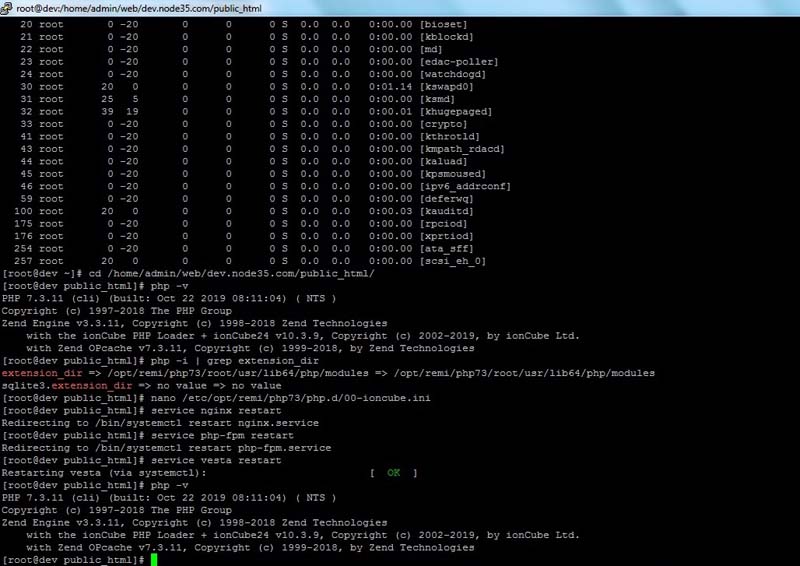
$ service nginx restart
$ service php-fpm restart
$ service vesta restart
Apache restart command for Debian/Ubuntu
$ service apache2 restart
11. Verifying ionCube Loader
Now we need to verify our ionCube installation, whether it has been installed correctly or not. We can verify it using the php -v command in the SSH terminal.
[root@dev public_html]# php -v
PHP 7.3.11 (cli) (built: Oct 22 2019 08:11:04) ( NTS )
Copyright (c) 1997-2018 The PHP Group
Zend Engine v3.3.11, Copyright (c) 1998-2018 Zend Technologies
    with the ionCube PHP Loader + ionCube24 v10.3.9, Copyright (c) 2002-2019, by ionCube Ltd.
    with Zend OPcache v7.3.11, Copyright (c) 1999-2018, by Zend Technologies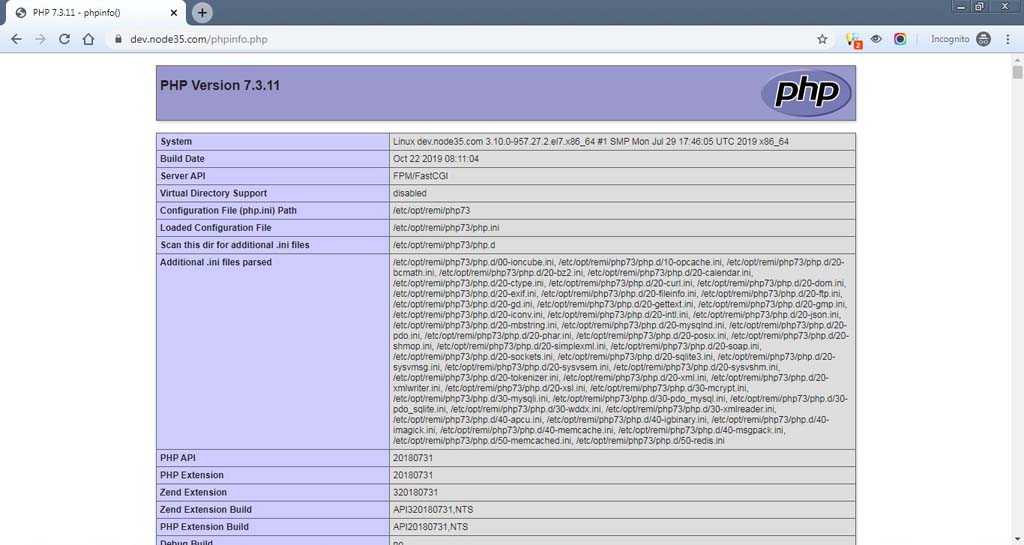
For RHEL/CentOS:
$ php -v
$ php73 -v
$ php72 -v
$ php71 -v
$ php70 -v
$ php56 -v
For Debian/Ubuntu:
$ php -v
$ php5.6 -v
$ php7.0 -v
$ php7.1 -v
$ php7.2 -v
$ php7.3 -v
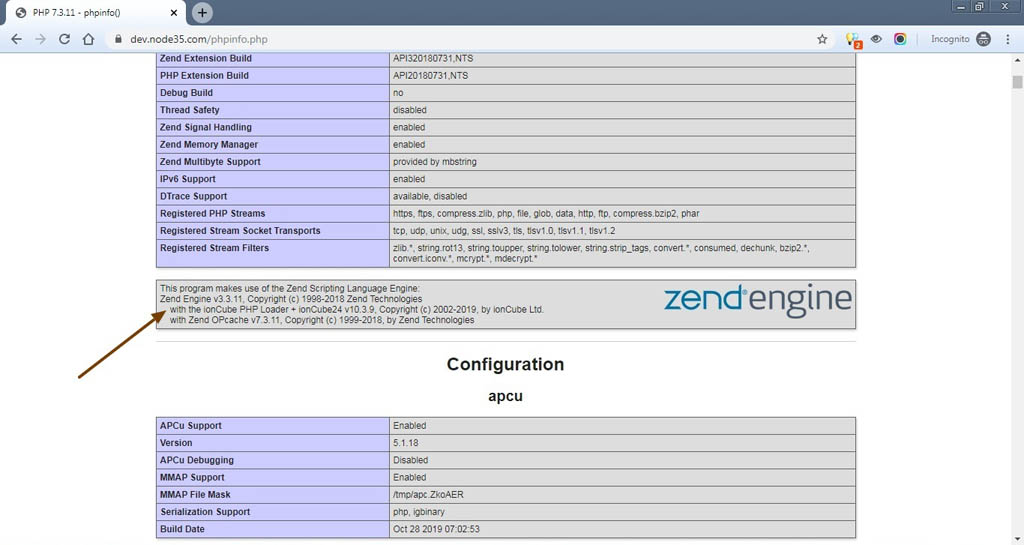
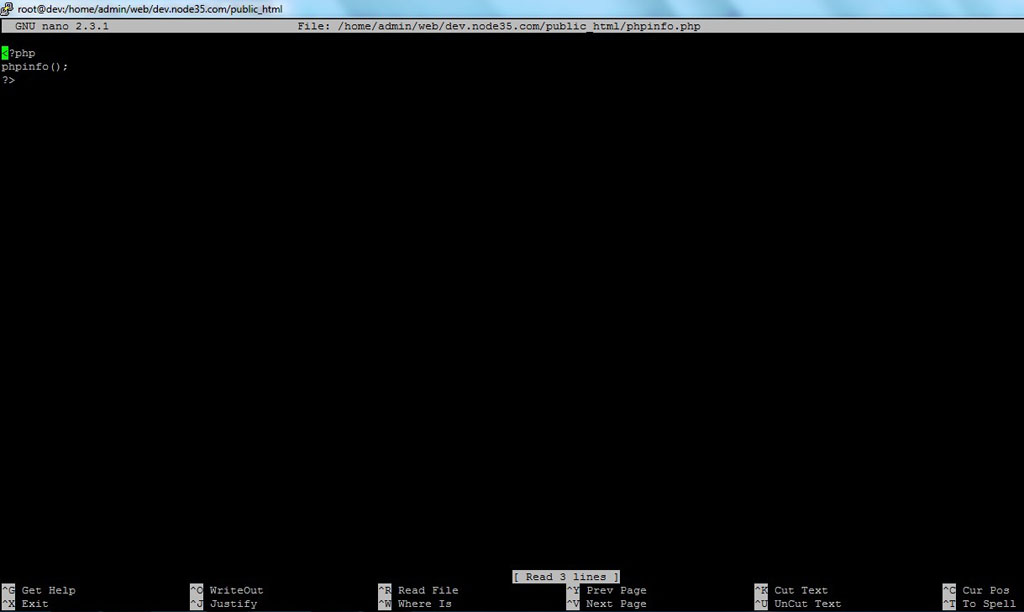
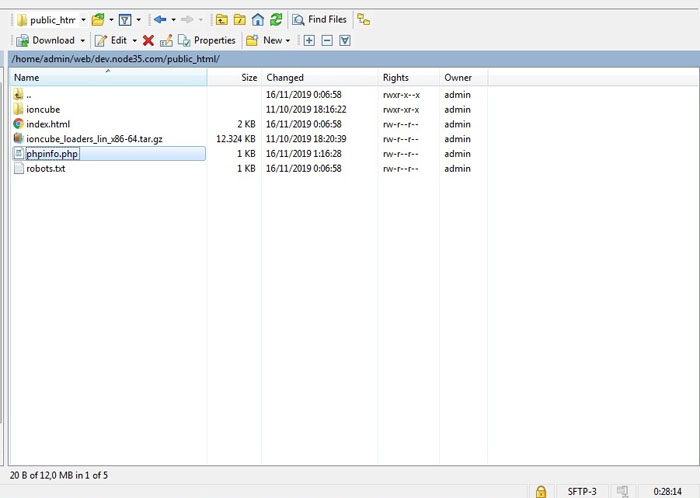
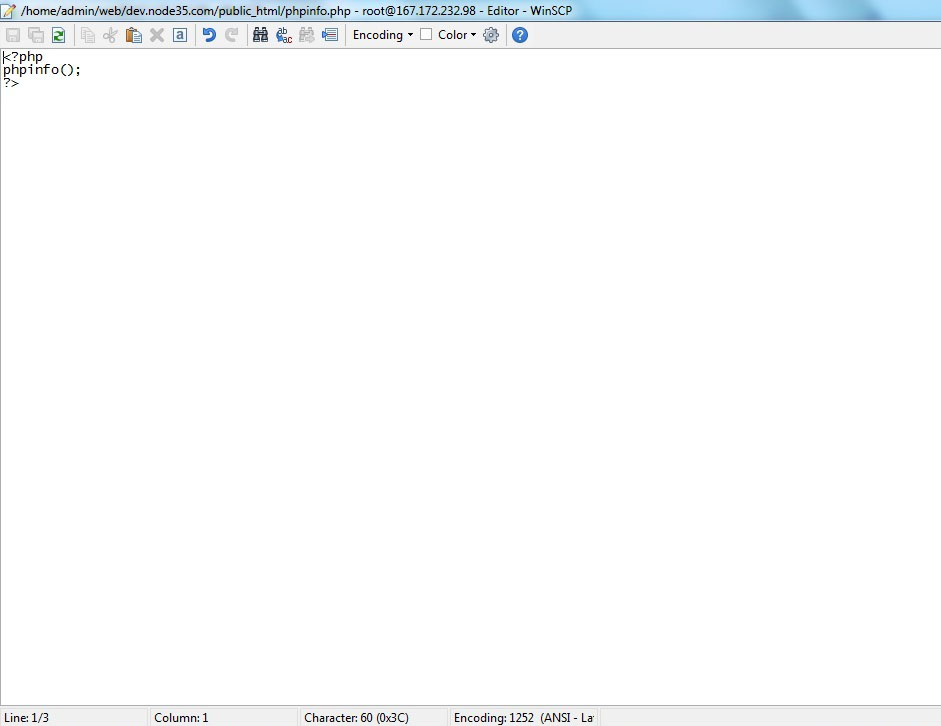
In addition, we can also upload the phpinfo.php file in your site’s public folder in order to verify the IonCube Loader installation. Paste the following snippet code into phpinfo.php file.
$ nano /home/admin/web/dev.node35.com/public_html/phpinfo.php
After that, we need to open https://dev.node35.com/phpinfo.php on our web browser to verify the ionCube Loader installation. If the configuration is correct, we will see the following output.
# https://dev.node35.com/phpinfo.php
12. Test ionCube Installation via Loader Wizard
If you want to test your ionCube installation via Loader Wizard, you can open loader-wizard.php file in your web browser. Like this…
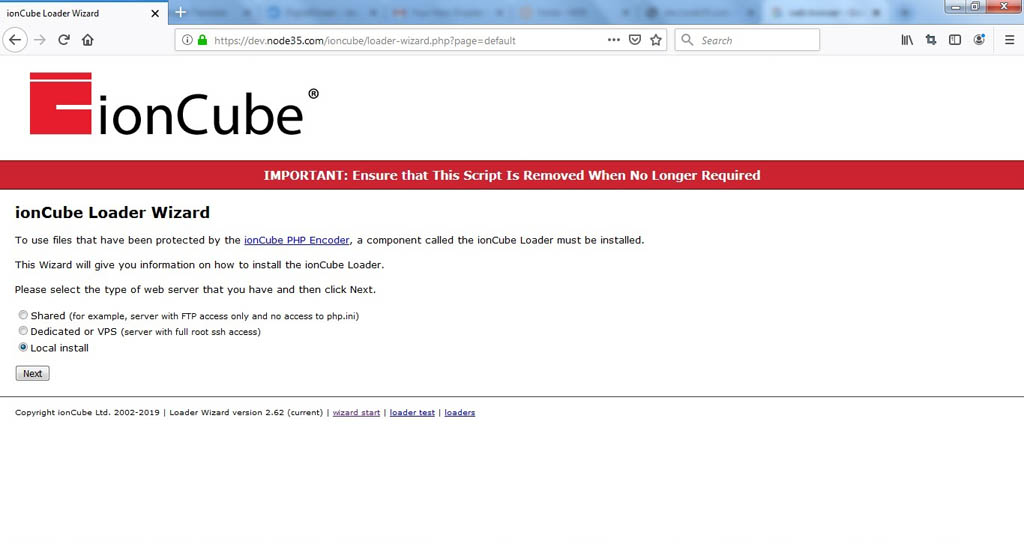
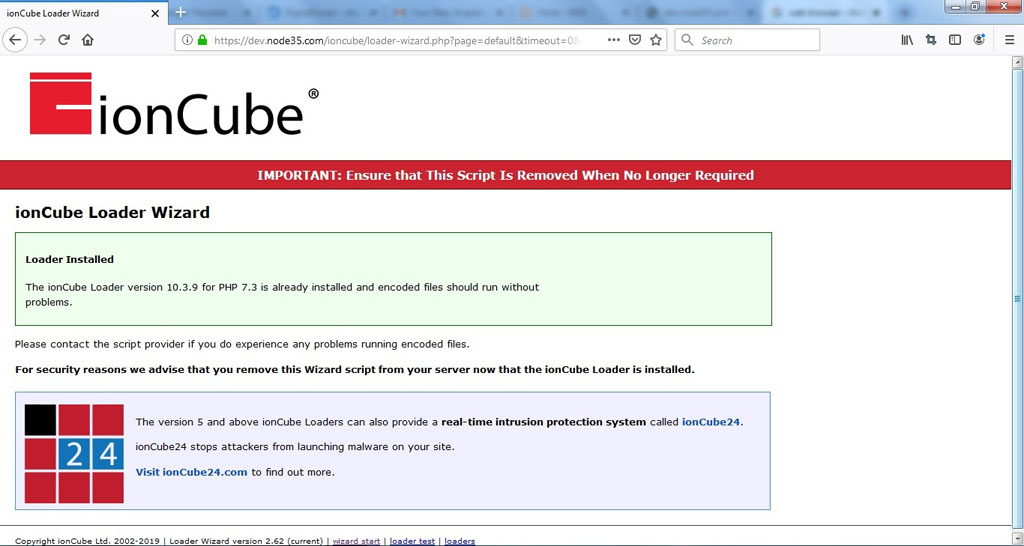
# https://dev.node35.com/ioncube/loader-wizard.php
13. Remove ionCube Folder
It’s not safe to keep the ionCube folder in the public directory, so we must remove ionCube folder since we have successfully installed the ionCube Loader PHP extension on our server.
$ cd /home/admin/web/dev.node35.com/public_html/
$ rm -rf ioncube
$ rm -rf ioncube_loaders_lin_x86-64.tar.gz

We are a bunch of people who are still continue to learn Linux servers. Only high passion keeps pushing us to learn everything.

